Instructions
- Go to the Integrations page on Billables AI and select Centerbase from the Billing Integrations dropdown. Then click "Authorize".

- You'll be prompted to enter your Centerbase credentials to enable your account.

- You should see the Integration connected once you've successfully enabled:

Upon successful completion, you'll see your clients and matters populate on the Billing Codes page:

Exporting Time Entries to Centerbase
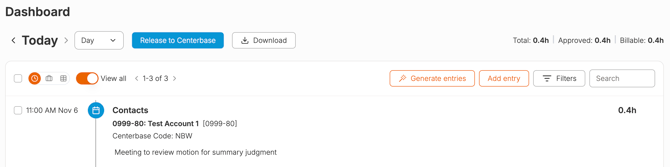
Review and approve your time entries directly in the Billables AI dashboard. Once you're done approving your time for each day, you can export all your time entries back to Centerbase by clicking the "Release to Centerbase" button at the top.
Best Practices
Set a Centerbase Code default value.
Billables AI automatically syncs your Centerbase codes as a custom code in Billables AI.

We recommend selecting default value for your code by visiting the Settings page and selecting a Custom Code default value. This default value will automatically populate for all your time entries, with the option to edit as needed.

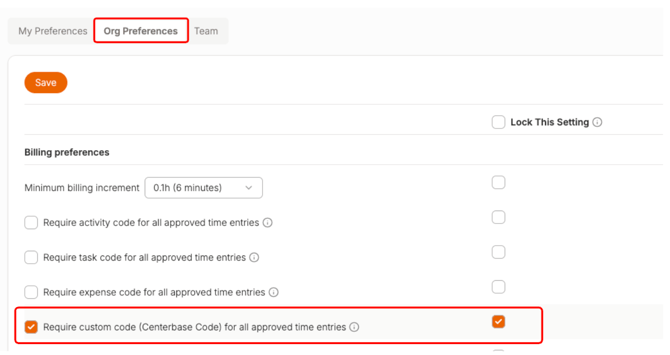
Require Custom Code for all Time Entries
If your firm requires the Centerbase code for all your time entries, we recommend implementing an org setting that will require this to be inputted before time entries are approved.
FAQs
What should I use for my Centerbase login?
If a billing rate changes, does the new rate apply to previously unapproved time entries or only to future entries?
Billing rates are applied at the time of export, not at the time the entry was created or approved. This means that if a rate is updated, any time entries exported afterward—including entries from prior months—will reflect the current rate at the time of export.
What is the Centerbase Code?
Centerbase requires a code for each time entry in order to release into their system. This code set can vary by firm but usually indicates billing type (e.g. "billable", "non-billable", "hourly", etc.)
This is what the code typically looks like in Centerbase:

In Billables AI, you'll see the code as an option when editing and approving your time entries:

Pro Tip: If you frequently use the same billing code, you can set it as your default in the Settings page.
