Systems administrators with company-level administrative privileges for Microsoft 365, Teams and Zoom can follow these steps to grant Billables AI integrations access to employees within the organization.
This ensures integrations are secure, compliant, and restricted to authorized employees. For more information about Billables AI privacy and protection, see our Security Overview.
Microsoft 365 Instructions
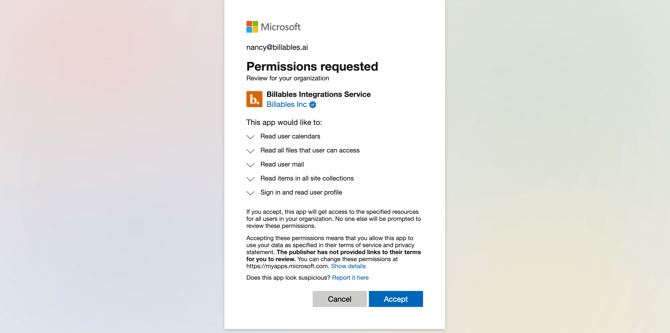
Enable delegated permissions: Visit this admin consent URL in your browser and log in Microsoft Admin account. Then click Accept when prompted:

Microsoft Documents (Word and Excel)
Individual users can enable application capture for their activity in Word and Excel, therefore requiring no Org Level Authorization.
If, after discussing with your Billables AI point of contact, your firm prefers a direct integration with Word and Excel, please refer to this article for IT administrators: Microsoft Docs Add-In.
Microsoft Teams
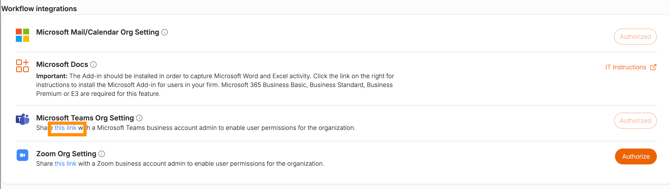
If you're working with someone who already has Billables AI admin access, please request the custom link from them. They can generate this link on the Billables AI Integrations page:
If you have not yet received a custom Teams link, contact our team. Please specify the email domain of the organization for which you are configuring the integration. Once your request is received, a secure, custom link will be generated and sent directly to you.
Zoom Instructions
To enable organization-wide Zoom integrations, your company or firm must have an active enterprise Zoom license. Individual users holding a Zoom Pro or higher subscription may connect their personal accounts for individual use.
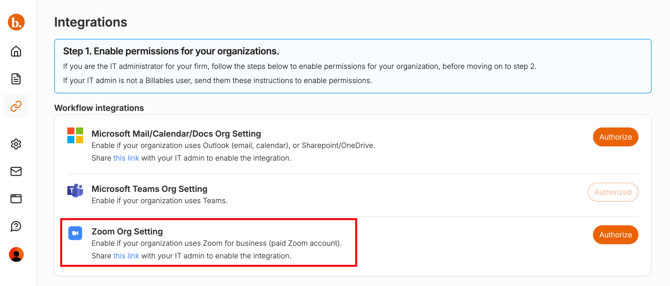
If you're working with someone who already has Billables AI access, please request the custom link from them. They can generate the custom link on the Billables AI Integrations page:
Alternatively, you can request a custom Zoom link by contacting our team. Please specify the email domain of the organization for which you are configuring the integration. Once your request is received, a secure, custom link will be generated and sent directly to you.
Billing Integrations
If your firm has designated you as the administrator for its billing platform, please visit our Billing Platform Integrations page for detailed setup instructions.