Setting Up Centerbase Permissions for the Billables AI Integration
Last updated: September 18, 2026
Why this matters
Billables connects to Centerbase through a single Centerbase user account, and the integration inherits that account's permissions. Those permissions carry over to the time entries the integration creates. For example, if the connecting account doesn't have view or edit access to time entries, then once entries are released to Centerbase, your other Centerbase users won't be able to view or edit them either.
Recommended setup: use a dedicated service account
Instead of connecting through an individual's login (like an office admin or partner), we recommend creating a separate Centerbase user just for the integration. For example: billing@yourfirm.com. Since your firm sets this account up yourselves, it can also double as a general billing email if that's useful.
Benefits:
Entries are tied to a neutral service account instead of a real person's profile
The connection doesn't break if that person changes roles, resets a password, or leaves the firm
Step 1: Create the service account
Your firm creates the email address and the Centerbase account on your end. Centerbase has confirmed they won't charge for this seat, but you should still work with your Centerbase Service consultant or CSM to make sure it's set up as a seat that isn't billed.
Step 2: Create a dedicated group with the right permissions
Create a new group with only this integration user in it, rather than adding the user to an existing group. That group needs permission to create billing entries across all timekeepers, not just its own.
Step 3: Set record security for Billing Entries and Billable Events
In Centerbase, go to Permissions > Record Security and find Billing Entries and Billable Events. For each one, set:
Allowed to Create: checked
Owner: Creator
Access: Public
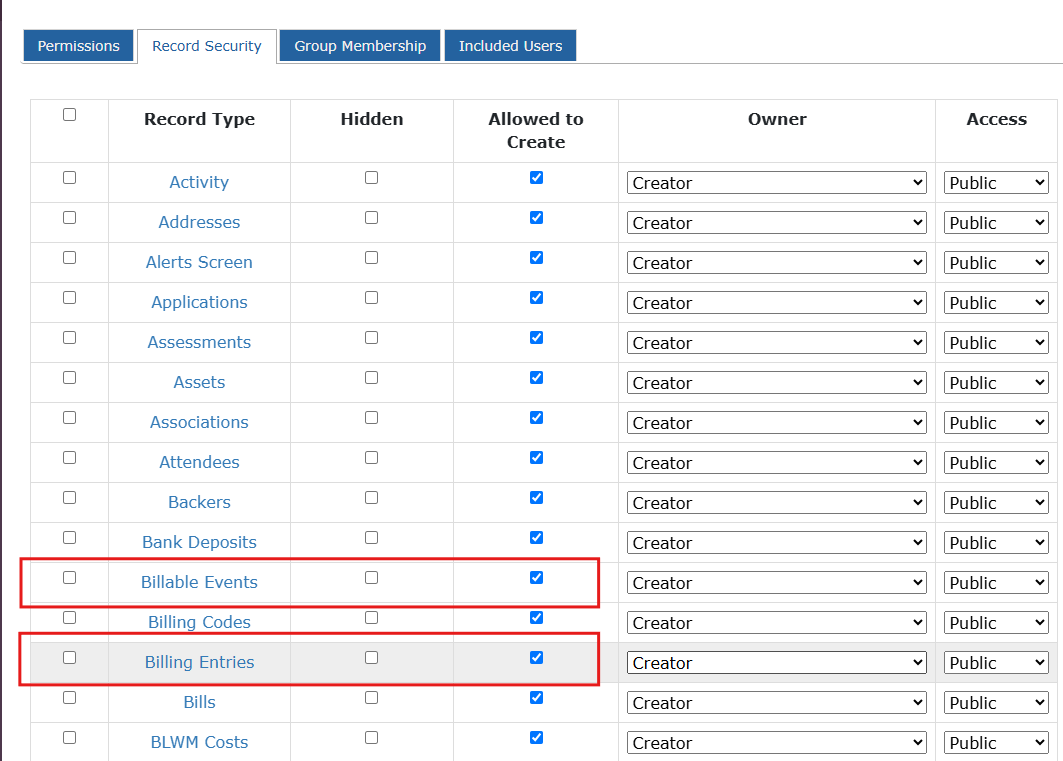
Record Security tab. Billable Events and Billing Entries are highlighted.
Then, on each of those two record types' own permission screen, make sure the Creator group has View, Link, Edit, and Delete all checked. This matters because your other users still need to be able to view, edit, or delete billing entries created by the integration user, depending on what access they should have.
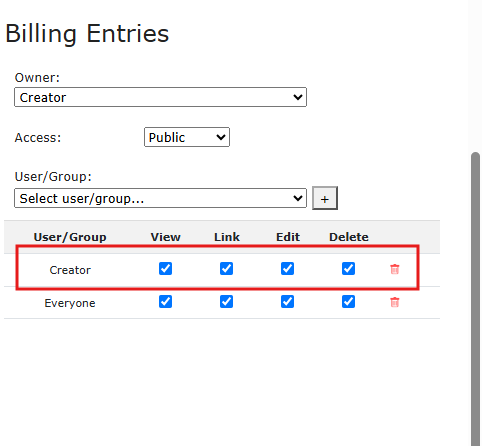
Billing Entries permission screen.
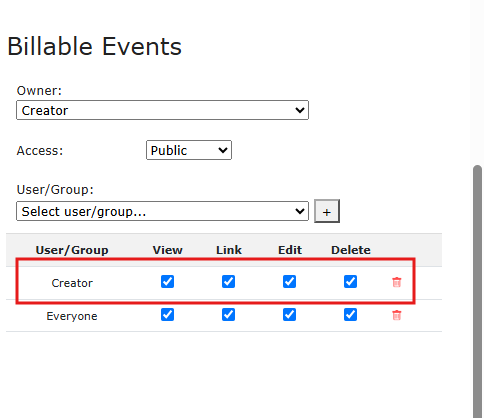
Billable Events permission screen.
Step 4: Reconnect the Billables integration
Once the service account is set up with the right permissions, reconnect the Billables integration using that account instead of an individual's login.